8/24/2016

Birthday Party* ORGANISATION | Invitations, decorations, cake, menu, outfit

Hello dear readers !
Finally I can call myself an adult, at least that's what the numbers say, in reality I'm not ready for adulthood at all :D But on the 17th of June I've turned 18 ! Today I would like to share with you my birthday party, outfit and everything between, maybe give you a little inspirations that you can use at your party.

Invitations

The first thing that I started playing with after we've established a date for my BDay party were the invitations. I love to play with photoshop so I decided to work with that. For the design I went with a striped and floral theme with gold accents. Here is the pattern that I created, you can use it for yourself if you'd like :)

Decorations

Second thing that I started to interest in after the invitations was some party gear. I went kind of light, I decided to buy couple name tags that I've put on my guests cups, everyone had a golden writing on it, I saw this detail while I was on a wedding in France and I knew immediately that I want something like this for my party as well. Then another thing I decided to buy, were 2 huge balloons in the shape of numbers 1 and 8 they came a lot bigger than I anticipated but I love them !


The rest of the decorations was provided to us from the restaurant I had the party at, but we tried to fit it to my color scheme as much as possible. The one thing that we decided to provide to the restaurant was a bouquet of flowers that match the flowers on my invitations just for that added touch of elegance.

Cake

My birthday cake was made by my singing professor she was so nice to spend her time and create this fabulous cake for me ! The design of this cake was inspired by my invitations so again black and white stripes and some edible flowers, just gorgeous. In terms of flavors I've picked a berry filled vanilla layer and a dark chocolate layer oh it was so delicious !!! Really hands down, one of the best cakes I've ever had.


I also had an unexpected birthday cake made by my godmother, it was delicious. It was a fruity cake with layers of fruit and chocolate on a vanilla sponge cake !


Menu

When I was deciding what kind of food I want at my party I was really thinking baout the fact that it's going to be summer so I want the menu to feel light and summery, if I can't have a party on the beach I want at least food that's going to seem like we're on a beach. For drinks we had just some champaign but to make it a little more special we added some fruit kaboobs in each cup, it really looked gorgeous and matched the whole decor. For appetizer I decided not to have a soup, instead of that I chose a simple honeydew melon wrapped in prosciutto, there were also a couple of toasts to go with the dish. 


For the main dish I wanted something that would please a lot of people so i went with chicken breasts filled with blue cheese. As a side dish there was some rice and steamed brocolli that were both topped with a creamy cheesy sauce.

Outfit and Make up

I had planned a couple different outfits dor this special day but at the end i decided to ho with a pair of white shorts from H&M then a nice boho looking indigo blouse and some nice purple shoes to finish the outfit. 


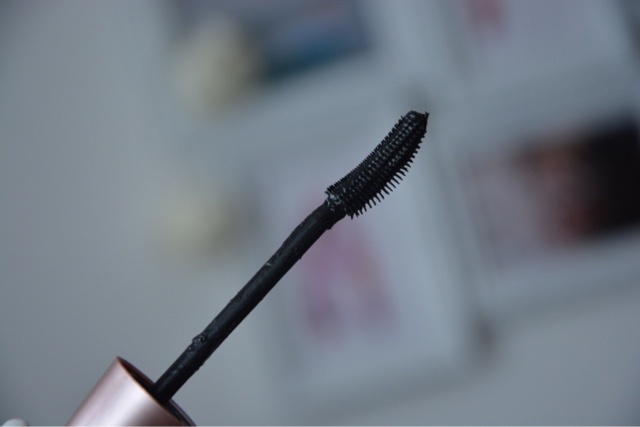
In terms of makeup I went very simple because nobody wants to look overdone on their special day, right ? For the eyes i chose a nude eyeliner from Rimmel London for my waterline then I applied a shimmery eyeshadow all over the lid and then to finish it off i just topped it with a coat of my new waterproof mascara from Rimmel London, you can read a full review on these two products here if you' re interested.

For my lips i wanted to try something completely different than my usual bright lip. I finally got my second liquid lipstick from LA Splash in the shade ghoulish just in time for my birthday so i decide to go with that i think that it nicely complimented the whole look. 

Gifts

So i really just want to thank to everybody for giving me some amazing gifts that i will cherish forever but mostly i would like to thank everyone for coming that was the best gift forever. I've got a lot of different unique things vut some of the things that i'm most excited about are my new sunglasses from Ray Ban, i really wanted them for a long time so I was very happy when I saw them. Then another gift from my parents that i didn't expect at all are my new gold opal earrings, I just love them, they are exactly what I was looking for. And the ladt gift I would like to mention is my pandora bracelet, this was totally unexpected and it really made my day ! Can't wait to start collecting all these charms ;)


Of course the rest of the gifts where amazing as well but that would be a really long post and I don' t think a lot of people would be interested in reading that.

Apart from gifts my parents also took me to an outlet city nearby to do some shopping and that was amazing as well.


So thanks a lot for all of you that decided to spend some time from your day with reading this article, it means a lot to me. This year was such a great journey I have learned a lot since I started writing in December :) 

8/17/2016

THE BODY SHOP * Haul | REVIEWS FIRST IMPRESSIONS 2

Hello friends,
Recently I had my birthday, if you're interested i have a whole blog post about this special day here. But back to the subject I done a little shopping for my birthday and I also visited one of my favorite shops to go to and that' s bodyshop. I get 80% of my skincare from bodyshop, I really like their selection and the fact that their products try to use a lot of natural ingredients and they are also cruelty free ! Here are some products that i got that i would like to share with you my opinions about.


Originally i wasn't planning on buying this product but when O saw that it was on sale I just went for it. And it' s a new body butter this time I got a new scent, the coconut one, it smells so good, especially if you love coconut as I do. It smells totally like coconut not like that artificial coconut scent that you see a lot of time in cosmetics.


The consistency is very nice it' s a little less thick then for example my raspberry body butter this has a wonderful texture and it's super easy to spread all over the entire body. Also make sure you really like the coconut scent because this scent will be with you for a while. I applied during lunch time and still in the evening when I smelled my skin I could definitely smell a mice hint of coconut.


The rest of the things i got are for my face, i like to change my skincare at least once a year and try new and different things that would replace the old ones. So far i had mostly good luck with bodyshop so I got some more bodyshop products to experiment with.

First one being this blemish gel from their tea tree range. I got it mainly because I' m out of my tea tree oil. I am pleasantly surprised i think that this gel is even more effective than the tea tree oil. It has a nice smell and a cooling feeling.


It is a clear gel with a dough foot applicator, that' s the one thing I' m not that thrilled about. I don' t think that it is that sanitary to use the applicator on your blemishes and then put it back into the tube with the germs. Overall I like it i would just prefer to change the applicator a little bit.


Another thing that i got mainly because i used all of my tea tree mask up is this new blue corn 3-in-1 mask. I love that it foes contain the blue corn powder that exfoliates the skin while you do the mask so that takes away one of the steps that I do normally. The consistency is very nice, it' s a clay mask that dries down on your skin and forms a shell that feels tight on your skin. The thing apart from the exfoliations that I really appreciate about this mask is the little tingle that you get from this mask it really feels like it does something good for your skin and holy cow it does ! I really think this is one of the best masks I've ever used. It does get rid of all of the black dots that were visible, it leaves my skin looking radiant and clean and I definitely feel more defined and fresh looking.


One thing you should be aware of is the smell of the mask ut has a very prominent as my mum described it a baby lotion smell, at first i didn't like it but then when i applied it I actually started to like it ! 


The last thing that I decided to get is the vitamin e eye cream, it comes in this little pink tube that doesn't seem like much but it really contains a lot of product and you need just a little bit. I just apply a small amount under my eyes and i tap it on with my ring finger. I haven' t used it long enough to see the effects but I will update you as soon as i see something. So far I really like the consistency it doesn't irritate my eyes which is amazing so I' m really happy with it for now.


And that' s all i got during this trip, i got just a couple of essentials that i really needed but overall I' m really happy with everything what I bought. And there was one small bonus with my purchase that really surprised me, there was this special discount if you use this limited edition bag to shop at bodyshop. This bag will cost you 4 € but everything that you decide to buy is going to be 20% off which at the end saved me like 8 € ;) snd as a bonus the bag is super cute and i can definitely see myself using it a lot :)

Thanks for reading until next time :)

8/10/2016

Chocolate Cheesecake with Oreo Crust * RECIPE |

Hello dear readers !
Today in celebration of my birthday that was last week I would like to share with you a recipe for a chocolate cheesecake that I have made for my class. I have originally found this recipe here but I have made a couple adjustments to my liking so here's what I came up with.


For the crust:
1 ½ cups Oreo Cookie Crumbs
⅓ cup melted butter

For the filling:
3 250 g packs of Ricotta Cheese
100 g of dark chocolate
1/2 of coconut sugar
4 eggs
1 tbsp of cinnamon
3/4 cup of whipping cream

For the glaze:
1/4 cup of whipping cream
1 cup dark chocolate chips

Start by preheating the oven to 300°F. Then grease up a 9 inch (23 cm) round springform pan and make sure cover it with aluminum foil from the outside so that the butter doesn't drip during the baking process. 

To make the crust, crumble the oreos into small pieces, then add the melted butter and press into the form with your hands.

Mix together the ricotta cheese, melted chocolate and sugar together, after that start to add the eggs. One at a time making sure to beat the egg completely before proceeding to another one. Last step is to add the cinnamon and the whipping cream, blend it all together.


Bake for 60-70 minutes until the cake doesn't appear shiny. Then immediately put the cheesecake out of the oven and run a knife along the sides of the cake and open the springform to release it.


While you let the cheesecake cool down a little bit you can prepare your glaze. Start by putting the whipping cream inside a pot and put it on low heat for couple minutes but don't bring it to a boil you just want it hot enough so that it melts the chocolate quite easily. Then put the chocolate inside and let it just melt over low heat. After you see that the chocolate starts to melt turn it off the heat and stir until the chocolate is nicely melted.


Last step is to pour all of the ganache over the cake after it has cooled down completed and decorated with little pieces of chocolate and a light dusting of cinnamon.

That's it let the glaze set and your fantastic cheesecake is ready !! 


I'm sorry for the bad picture styling and everything but I had to cut this cheesecake into 24 pieces and that was a challenge normally, if cut in to like 12 or 16 pieces the crust should hold the shape and don't crumble as much. But one thing I can assure you is that every person that tasted this cheesecake said it was delicious so that says something, doesn't it ? 

SO that's all I have for you today If you still fancy some more cheesecake inspiration check my recipe for a traditional cheesecake here.


8/03/2016

Coconut Oat Bundt Cake* RECIPE | Gluten Free, Healthy

Hello dear readers !
After a long time I have prepared a recipe for you, it's going to be another dessert. I'm going to show you how to make a delicious yet healthy bundt cake full of coconut flavor ! Let's get into it !

Ingredients:
11 tbsp of oat flour (you can make some by blending gluten free oats)
11 tbsp of gluten free oats
11 tbsp of unsweetened shredded coconut
5 tbsp of low fat yogurt
4-5 tbsp of coconut sugar
4 eggs
3 tbsp of coconut oil
1 packet (12 g) of baking powder
1 tsp of cinnamon
1/2 cup of water

So first you're going to separate the egg yolks from the egg whites and put them in two separate bowls. Then to the egg yolks you're going to add the sugar and with an electric whisker, whisk it until it forms nice and smooth mixture. Then you're going to add the melted coconut oil with the yogurt and mix again. Then start to add all the dry ingredients, don't worry it's going to seem really thick but after you add that cup of water you're going to notice a difference. You can mix it with a spoon or again with a whisker it doesn't really matter.


Now make sure you really clean the whisker and start to beat the eggs until they form a fluffy white foam that's stiff. Then add it and fold it in the previously formed mixture until just combined. Last step is to pour it into the bundt cake mould you can also use a different one if you'd like and then bake it for 50-60 minutes on 300°F make sure to check it once in a while so that it doesn't get burnt.


 My was done after 50 minutes, then you're going to let it cool down and your bundt cake is ready to be flipped on to a plate :)


That's it a very simple and delicious bundt cake recipe that captures the amazing flavor of coconut beautifully. Thanks for reading until next time :)

7/27/2016

Rimmel London * REVIEW | Lash Sensational mascara and Exaggerate Waterproof Eye Definer

Hello !
so after a very long time I have a review for you ! If I may be precise it's a makeup review for the Rimmel London Lash Sensational mascara and their Exaggerate Waterproof Eye Definer, I decided to test these out based on a couple of reviews on youtube and I must say that I'm quite happy about my purchase but I'm going to explain that in my review.

So let's start with the mascara, I was on a hunt to find a really good black mascara that wouldn't clump my lashes together but still would give me nice length and volume. I don't really like to spend a lot of money on make up because I'm more of a occasional wearer than an everyday makeup junkie and so drugstore was the only way to go for me. In the past I had really good experience with the Rimmel London brand so that was my first stop, at first glance I notices this lash sensational mascara that I heard talking about on youtube. I looked at the brush and everything and it seemed pretty promising.


The bristles on the brush have different sizes, you have small tiny ones that hold on a lot of the product, I think you're supposed to use that part on your roots and then with the longer bristles work your way to the ends of the lashes. I really think that the design of the brush is quite convenient and pretty easy to use, the only thing that bothers me a little bit is the fact that even on the most outer part of the brush it's pretty thick and kind of hard to get to the smaller lashes in the inner corner of the eye. But as with everything in life if your willing to work with it it's going to work for you as well.


I got the waterproof formula so I went ahead and applied it to my bottom lashes as well, I don't think that this mascara is really that amazing in picking all those small lashes down there but as I said before it's usable and workable.


The consistency of the formula isn't too thick but also not too thin I would say it's a nice creamy right in the middle type of consistency. It applies evenly without major clumps of product. But one thing to be aware of is the fact that if you would like to build the product a little bit more the clumps are going to appear more likely and you'll have to use a spoolie to comb through your lashes.


One down side is the fact that it is so hard to remove as with most waterproof mascaras. Even my bioderma micellar water that removes the ling lasting liquid lipsticks had problems with this one but inguess i just have to get a new makeup remover.

Bottom line, for me personally as a person that has quite long and full lashes I really don't need a lot to make them stand out so I'm very satisfied with this mascara. It's nicely pigmented, the formula is great and it doesn't look clumpy as some mascaras. Another amazing thing about this mascara is the fact that it is just $7 dollars and for what it is and does I think that's an excellent price.

Another product that i got after watching a lot pf reviews on youtube is my waterproof eyedefiner in nude again from Rimmel London. It's a simple nude waterprpof eyeliner that transfers really good on to the water line. It doesn't irritaze my eyes and looks quite natural and fresh in the waterline. The staying power will vary depending on the moisture coming from your eyes but i can get about 5 hours of solid wear if I don' t accodentally rub myeyes. 


Overall i think that this is a great shade to use in the waterline ut doesn't look like a white line in contrast with your natural eye color but yet it brightens, the sometimes red irritated looking area that we all get when we' re tired. A nude eye liner like this is definitely going to make you more awake and fresh.


So to conclude on both of these i think that they are both great value for what they do for you in terms of making you look more put together but still not like you' re wearing a lot of make up. I would say that these two products are very beginner friendly because you cannot really mess it up.

Thanks a lot for reading se you in the next one :)

7/20/2016

4 days* Lookbook | OUTFITS OF THE WEEK 13

Hi everybody,
Today i have another lookbook for you ! I finally finished all of my exams so i'm going to try to really write down a lot more blog posts for you ! For right know let's start with the outfits.

Monday

My Monday outfit is pretty casual, on Sunday i bought my first pair of boyfriend jeans and i must say that they are super comfortable, now I understand why girls love to wear them so much they are very ripped so they are kind of a statement piece that' s the main reason why i decide to go pretty simple for the rest of my outfit. I combined a simple black long sleeved t shirt with a dark grey sweater just to really let the jeans be the star of this outfit. Then to add a touch of elegance I decided to wear my golden watches with a layered golden necklace and my oxfords shoes. I really like how this outfit cam together, I definitely don't regret buying these jeans even tough my mum said that they look as if a dog tore them apart.
Tuesday
Lovely day it was, the temperature were really high and so I decided to wear my floral shorts that I combined with a dark purple tank top and a simple dark grey sweater. Also as always I'm wearing my golden watches from Primark (I really should get a new pair:D) and then I topped it all off with a pair of simple beige flats with golden details.

Wednesday

Dentist day ! Just recently I received a package containing this beautiful dark indigo blouse, it's gorgeous, it's very flowy, transparent and gives me that total boho look I'm looking for. You definitely have to wear something underneath it so i decide to wear a simple black tank top underneath it that matches my black pair of jeans. And then to bring out the purple a little bit more I decide to wear my purple floral flats from H&M. Also as my accesories I'm wearing my white D&G watches.

Thursday

The last outfit I have prepared for you this week is a little similar to Monday's outfit, mostly because I went with the same boyfriend jeans and a similar color scheme. This time I paired them with a statement sweater dress that I tucked in for a unique look. I think that this kind of childish sweater alongside with these rough looking jeans make a really nice pairing. To finish the outfit odd I paired it with a brown leather bag and a pair of matching brown flats.


And so that's it I hope that you liked another edition of my lookbook until next time :)

7/13/2016

4 days* Lookbook | OUTFITS OF THE WEEK 12

Hi,
another week has come, and that means that finally we're getting closer to summer vacation ! This week I have another set of 4 outfits just for you.

Monday

On Monday I wanted to be very neutral so I went with simple white and grey combination. I decide to wear one of my favorite grey tops that I paired with a pair of white jeans from mango and my favorite layered necklace from Dorothy Perkins.

Tuesday

Second day of the week, I went with a very simple outfit I wore my butterfly oversized t-shirt with an oversized plaid shirt that I matched to my light blue shorts that I just got from H&M. I also decided to wear my mockingjay pin after a while to represent my inner Katniss.

Wednesday

Finally decided to wear a dress, bit because the temperature in the morning are still pretty low I went with a dress that has 3/4 sleeves. This dress comes from Promod and it was a love at first sight I love that oriental feel that it has. The burgundy color is also perfect. I matched it with a pair of black oxfords shoes and a simple cross body bag that has some camouflage green details that match the pattern of the dress.

Thursday

Recently I have bought some items from Mango because they were having some major discounts it was like 40 % off if you buy two or more pieces of clothing so I had to get something for myself. I couldn't wait to try it on so on Thursday I decided to wear my new dress that just makes me think of Kylie Jenner, it's this super simple turtle neck dress. The color of this dress is really unusual in my opinion it looks like cinnamon with little specks of black, really unique. I completed the look with my gold watches from Primark, a simple dark brown cross body bag from Carpisa and then my favorite spring/summer shoes from Lacoste.


And that's it, thanks a lot for reading until next time :)

7/06/2016

Tomato tarte with goat cheese * RECIPE | vegetarian

Hi everybody,
remember when I've done my goat cheese tarte recipe couple months ago ? Well today I have something a little bit different for you but with a similar taste. Again it's going to be a tarte recipe bit this time now cream nor eggs are involved, it's going to be more similar to a pizza.

Ingredients:
1 packet of puff pastry
200 g of goat cheese
1 onion
3 garlic cloves
1 tbsp of coconut sugar
1 tbsp of tomato paste
2 cans of diced tomatoes
250 g of cherry tomatoes
100 g of arugula
butter
whole wheat flour
salt and pepper to taste
1/2 tbsp of dries oregano
olive oil

Cut the onion into small pieces and mince the garlic, then transfer the onion with the garlic into a pot with a drizzle of olive oil. Roast for a couple minutes on high, until golden and add some salt and pepper.

Add the coconut sugar and wait until it caramelizes. Then season with some oregano and add the tomato paste. Roast for couple minutes and add the diced tomatoes. Cook for 10-15 minutes.


This tomato sauce would probably work great as a pizza base as well.


Moving along to the tarte. Grease up your tarte mould with some butter and flour. Then add the puff pastry making sure to cut away the excess dough. Then spread the tomato sauce all over the tarte and add the diced cherry tomatoes along with the goat cheese on top.


Bake on 180° for 30 minutes, then sprinkle with some arugula on top and your tomato tarte is ready to be served !

I hope that you liked this recipe, until next time.