3/30/2016

Tandoori Chicken Masala Curry* RECIPE | Dairy free

Hello everybody,
two main dishes in a row I'm really trying right now I guess after that long list of desserts that I've been posting over the past couple days. Today I'm bringing you my recipe for Tandoori Chicken Masala Curry, for this recipe I was inspired by this amazing blog that is full of delicious recipes. Of course I had to make some changes that I think make it even better in my opinion and give it a little bit of a different taste. I love the original recipe as well so let's get to my take on this yummy tandoori chicken.

3 chicken breasts
3 cloves of garlic
150 ml of coconut cream
1 tbsp of oil
1 tbsp of minced ginger
1 tbsp of turmeric
1/2 tbsp of garam masala
1/2 tbsp of paprika
1/2 tbsp of ground cumin
1/2 tbsp of minced coriander
1/2 tsp of cayenne pepper (add more for added spiciness)
1 tsp of salt (add to taste)
1 tbsp of sunflower oil (you can use any oil you have on hand)

First, you're going to start by mincing your garlic and ginger.


Then you're going to combine all of the spices with the exception of cayenne pepper and salt to a big bowl preferably one with a lid on so you can let your meat marinate.


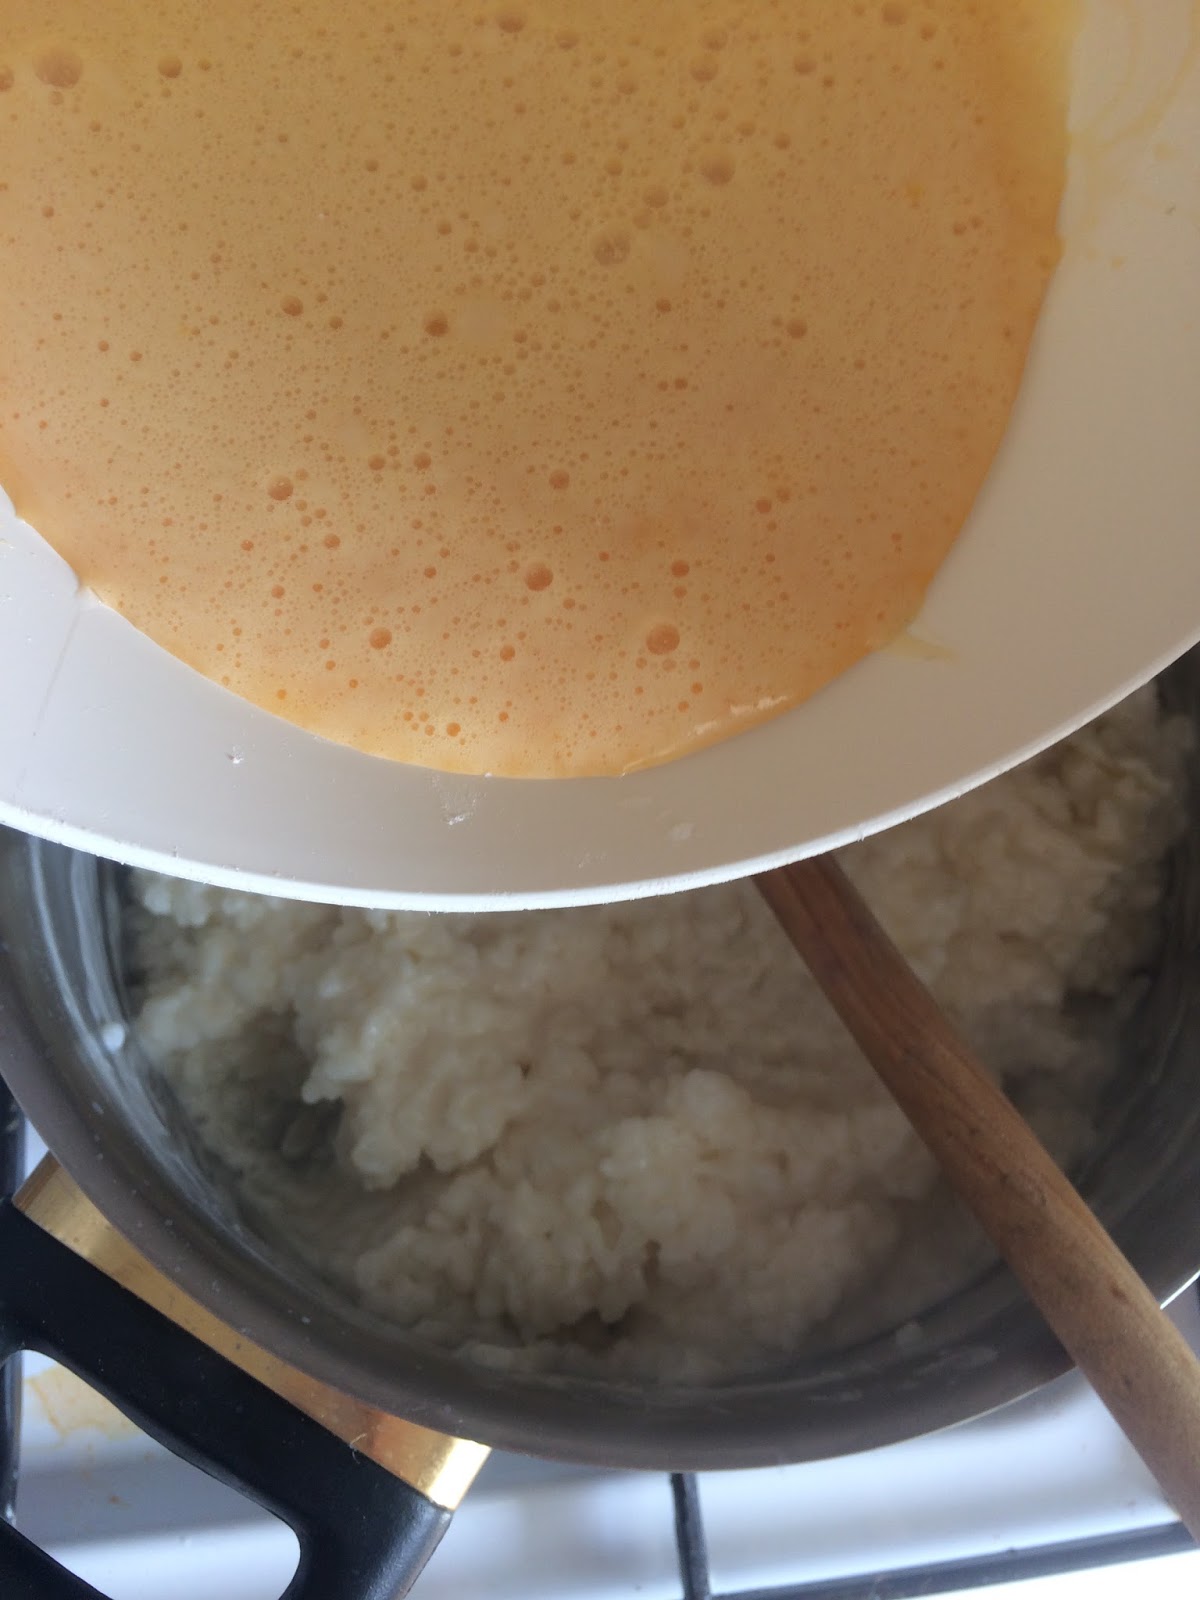
Then add the oil and coconut cream and mix well. Now it's time to add the cayenne pepper and salt I like to leave these two as my last step because I always start by putting just a little bit of each one and then slowly adding more to my taste.


 Mix it well again and your marinade is done.


Second step or you can do this before mixing up the marinade also is to cut your chicken breasts in to thin strips. You can also leave the chicken breasts alone and then fry them in a pan or bake them in the oven for a nice crust but because I want to make a curry this time I'm just going to cut my chicken in to bite size pieces.


Then I'll just combine my marinade and my chicken pieces and throw it in the fridge for couple hours, for best results leave it in the fridge over night so that the chicken really gets all the flavors soaked in.

The next day start by heating your pan and frying your marinated chicken.


When you notice that the chicken is nice and fried and you see no raw pieces on the outside you can add the rest of the marinade if there's any left.


My chicken soaked it all in so I decided to add a little more coconut milk and let my chicken cook in a pin with a lid on for at least 20 minutes on low. You want the sauce to be simmering the whole time.


As the last step cook your rice, or potatoes and combine it with your newly formed sauce in the pan.
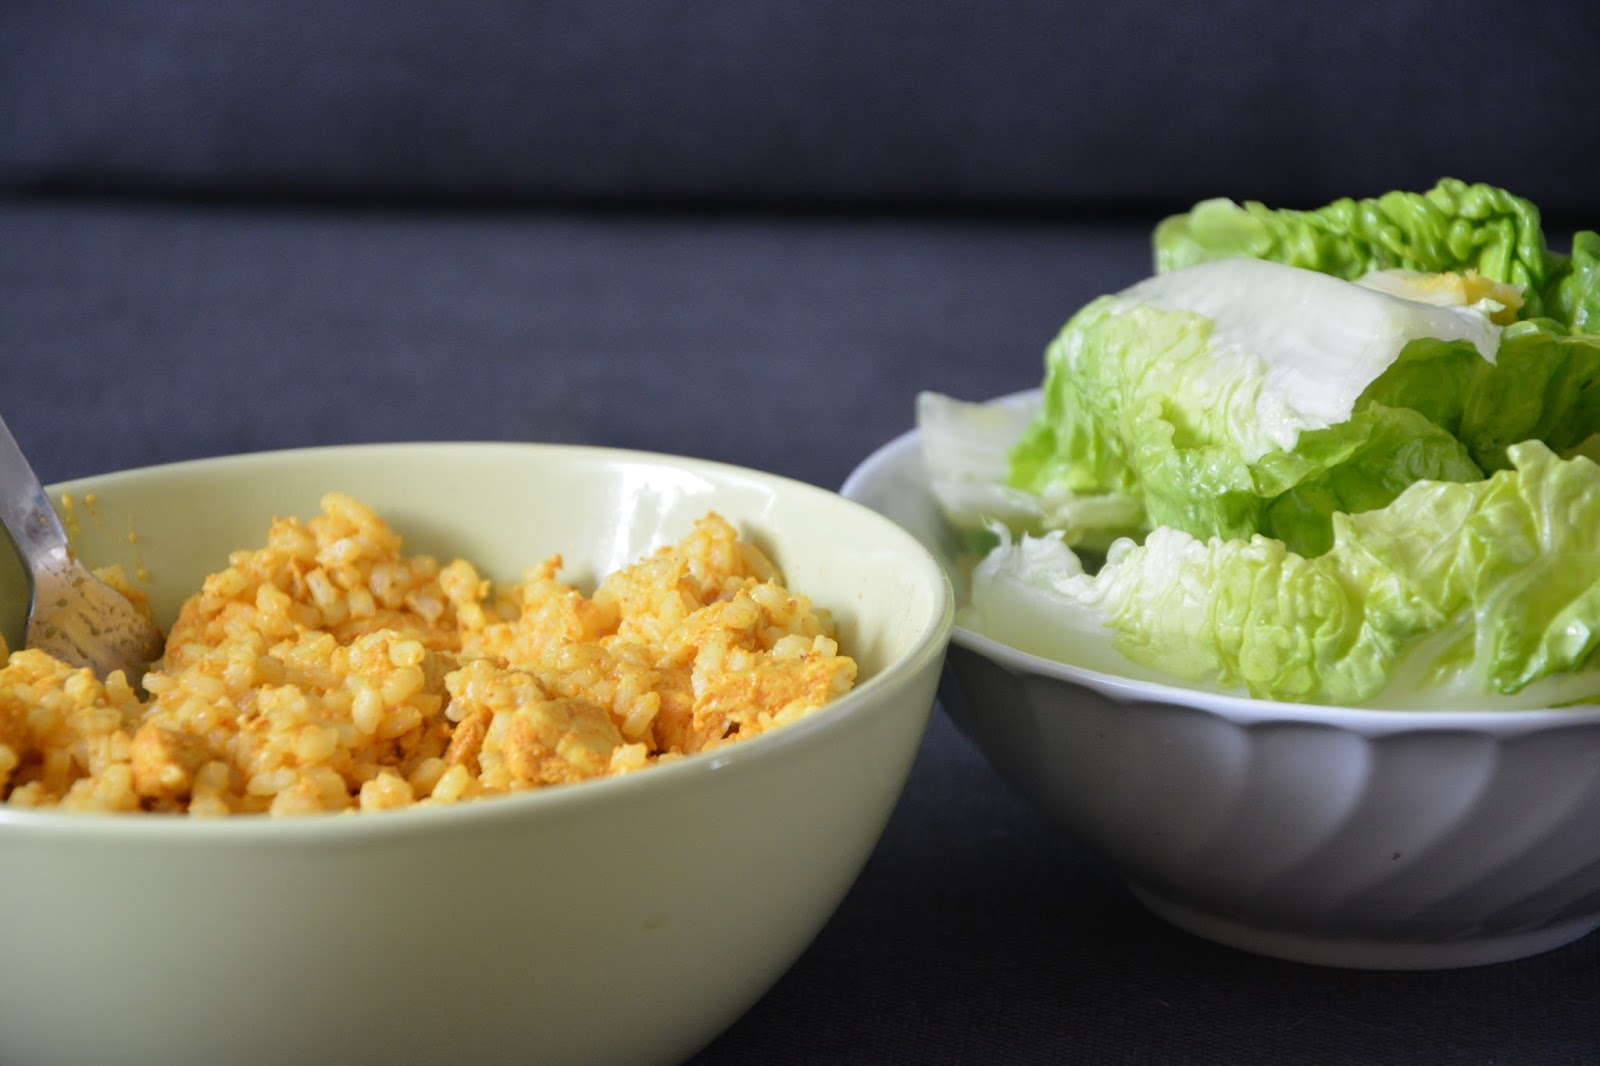
I chose to prepare some rice, so I just brought my water to boil cooked my rice for 10 minutes and then combined it with my chicken curry.


Mix well together and your curry is ready to be served.


I also decided to add a little bit more of salt cause I felt like it's missing something. I like to serve it with some salad in a simple vinaigrette (salt, pepper, vinegar and water).

Couple ideas for this recipe would be adding some carrots to the meat or a sweet potato also you can swap the coconut cream if you don't have any for a plain white yogurt as the original recipe suggested.

That's it I hope you like my take on this curry, I don't know if I should even call it a curry when it doesn't contain any curry powder or paste at all :D but it really seems like a curry to me so I'm going to call it like that anyways, Until next time Bye :)

3/27/2016

Holidays Potato Salad* RECIPE | Easter

Hello guys,
finally I have something else than a recipe for a dessert for you, it's Easter this week so I decided to share one of our traditional Easter/Christmas recipes with you. Every year it's a tradition that we make potato salad for easter usually with some schnitzels (if you never have had one of these I highly recommend you to try one) nothing different about this year. I think that potato salad is a very personal thing and that almost every family has its own recipe for the best one. I don't know if my recipe is the best one for everybody but it definitely is for me, this recipe comes from my grand grand mother so it's pretty legit I would say :D It's passed along through generations and here I am sharing it with you also. I hope that you'll like this one so let's get to the ingredients.


250 g of sour cream
175 g of mayonnaise
17 medium sized potatoes
6 eggs
1 small red onion
1 can of peas
1 can of mixed peas with baby carrots
1/2 jar of pickles
4 tbsp of pickle juice
1 tbsp of mustard
salt
pepper

First start by cooking your potatoes you can keep the peel on because you're going to peel them after their cooked. You just want to put them into boiling water and let them cook for about an hour or until tender, this will depend on the size of your potatoes. At the same time cook your eggs, you want to get traditional hard boiled eggs so like with the potatoes bring the water to boil and cook for 10 minutes and let them cool down. We usually do these steps the day before because you want your potatoes and eggs to be completely cooled by the time you start making the salad.


Next step is to peel the potato peel, and also peel your hard boiled eggs. Then you'll want to take a big pot and with a french fries cutter make fries out of your potatoes and eggs. It's the quickest way to cut potatoes for potato salad in my opinion but you can also use a knife if you don't have this little gadget.

Then you'll want to cut your onion, pickles and carrots to small pieces, for this we use a food processor because it's easier and it saves time and also I don't like that crunchy little onion bits in my teeth. Now you'll just have to assemble all the ingredients and mix it all together.

So put your cut onions, carrots and pickles to the potatoes and eggs, add your peas don't forget to drain them you don't want that juice in there. But on the other hand you'll going to want to use some pickle juice to make the salad more flavorful and juicy, so put about 4 tbsp of pickle juice in there, you can put more if you like your salad a bit more sour. Then continue by adding your mustard, mayonnaise and sour cream.


Last step is to mix it all up really well so that all the flavors get combined. You can also add a little bit more of mayo if you feel like it's dry, or a little bit more of pickle juice or a little bit more of mustard this really depends on your personal taste. Also add your salt this is very personal but I would say we use about 1 tbsp or less of salt we don't really measure it. And don't forget about some pepper too, we use about a teaspoon or less this is also personal.


That's it when you're confident with the taste of your salad you can eat it straight away or let it sit in the fridge for couple hours, that will allow all the flavors to really combine and bring out the true flavor of this salad.

I hope that you liked today's recipe, as I said it's something a little bit different than what I have done previously but I like changing things up a little bit. Until next time, bye :)

3/23/2016

Baked Rice with Apples * RECIPE | vegetarian

Hello everybody,
let's change it a little bit today, today's recipe is not going to be for a dessert but still it's going to be sweet. I'm talking about a sweet main dish that your kids will just fall in love with. Baked rice is something that kids here in Slovakia just love and it's one of the foods that everybody's grandma once prepared for them. I'm probably weird considering that this was my first time eating baked rice but I must say that I must've been living under a rock or something because this dish is just amazing. It's creamy, fruity, delicious full of flavor, just the perfect comfort food !


Let's get right to the ingredients:

For this recipe you'll need:
350 g of round grain rice
80 g of powdered sugar
135 g of melted butter
6 eggs
1L of milk
1 tsp of ground cinnamon
pinch of salt
1 kg of apples (you can use different fruits, like pears or berries, basically whatever you like)

You're going to start by cooking your rice in the milk with a pinch of salt until all the milk is absorbed and your rice is nice and tender. You want the milk to be boiling during the process so keep an eye on that.


While you cook your rice you can prepare the apples by slicing them to thin strips, the thinner the better. Make sure to stir the rice occasionally so that it doesn't get burned to the bottom of your pot. Once you're done with the apples and your rice is cooked you can turn it off from the heat and prepare your eggs.


First you're going to want separate the yolks from the egg whites in two separate bowls. Then it's time to whisk the egg whites until they from a foam and there's no visible liquid.


Secondly you're going to melt your butter add it to the egg yolks and at the end add the sugar and whisk until smooth. It's very important that if you're using the same electric whisker for the egg whites that you're using for the egg yolks that you first create the egg white foam and then move on and start whisking the yolks otherwise you would have to clean the whiskers really well before moving on to steps.


When you're done combine the egg yolks to the rice, mix well and add the egg whites in the end. Make sure that you combine it all really well. Everything should be very fluffy, foamy, light just like clouds. If you're happy with the rice mixture you can move to the last step and that it's putting everything into your mould, I would recommend using something that is about 20 cm in diameter and at least 10 cm in height because it's going to be pretty big. Grease your form with a little bit of butter.


I started of by putting a 1 cm layer of my rice to the bottom of my form. Try not to pour it cause the rice is usually at the bottom of the pot, you don't want to be getting just the egg mixture that would make a little omelette down there :D Then I layered my apple slices to form a circle, you can style them any way you want them but I like the design that this method gives me the best.


Continue adding as many layers as you want. In my case I layered another thin layer of rice until all of my apples were coated and then once again continued by laying a second layer of my sliced apples.


Then I applied my last layer of rice I just basically poured everything out of the pot distributed it evenly and topped it off with my final layer of sliced apple. You want to keep the best looking apples for this last step because that's the only part that's going to show up. When you're happy with the design you can sprinkle some ground cinnamon on top or a little bit of sugar if you want a caramelized crust and your baked rice is ready to be put right into the oven.


Set your oven to 180°C and bake for 35 minutes. After 35 minutes put it out of the oven and your baked rice with apple is ready to be served. The biggest challenge for me is the serving because it's super hard to get a whole piece especially the first one but let's be honest it really doesn't matter how it looks as long as it tastes good right ?


So there you have it a food that brings childhood memories to a lot of people, I hope that you liked my take on this traditional baked rice recipe. That's all for today until next time, Bye :)

3/21/2016

Berry Oats Tarte * RECIPE | Gluten Free

Hello guys,
I have another recipe in store for you today, and as you may guessed it by the name of it, it's going to be another dessert ! No surprises here I guess. This time I'm going to show you how to make this delicious naturally gluten free light cake that's perfect for summer when you want just that light refreshing dessert but really the whole year round when you're just craving some berries. I chose to use mix of berries for this recipe but you can use all kinds of fruits. Maybe just use raspberries or cranberries really the possibilities are endless. This recipe asks for some oat flour also so I'm going to show you how to make your own oat flour for a fraction of cost using just some old fashioned oats and a blender. But now let's get to the ingredients, so that we can start.


For the crust:
1 and 1/2 of cup of old fashioned gluten free oats
1/2 of coconut oil
1 and 1/2 tbsp of poppy seeds (you can use chia seeds if you want to add some fiber to it)
2 tbsp of honey
2 tbsp of water
1 tsp of ground cinnamon
pinch of salt

For the filling:
250 g of Ricotta cheese (you can use mascarpone instead or any other cream cheese you like)
2 tbsp of honey
1 egg white
350 g of berries (best used fresh but frozen are going to be fine also)

First we're going to make the oat flour. The easiest way to make oat flour is to use a high speed blender or a food processor and blend the oats on high until you get a flour like consistency, don't expect it to be completely fine but that's okay because oat flour is mostly used for cookies or crumbles where it really doesn't matter if the flour is finely milled or not. In this recipe it's going to give a nice crunch to the crust.


Now when your home made oat flour is made or bought if you want to save time, you can mix in the poppy seeds, cinnamon, a pinch of salt, coconut oil, honey and water along with your flour and try to form a dough like consistency. It's going to be really thick like when you're doing a graham cracker crust.
Next step is to put your dough in some foil and let it sit in the fridge for 15 minutes.


Make sure to preheat your oven to 200°C while waiting for your dough to cool. When done you're just going to press the dough into your desired form. I used one that had a diameter of 20 cm but I would suggest using something even smaller if you want the crust to be a little thicker.

Last step before assembling your dessert together is to prepare this delicious filling. I started by mixing ricotta cheese with your honey and egg white. Mix until you obtain a nice smooth consistency. Make sure to taste the filling before pouring it into your mould just to adjust sweetness because everyone likes their desserts to be a little different.


If you're happy with the taste you can simply pour and spread the filling onto your crust. Create an even layer and top it off with a generous amount of berries.


It's baking time. Put your mold into the oven for 35 minutes and your delicious light berry cake is ready to be served. When I was putting the cake out of the oven I noticed that the berries have released a lot of juice from them and it was bubbly and steamy. It looked great, but after couple minutes all of the liquid has set to a sirupy consistency so you don't have to worry about messy berry juice spills everywhere :D


That's it simple quick yet delicious cake that is perfect for these days when a big chocolate cake is just too much but you still want to reward yourself with something sweet and fruity. I hope that you enjoyed this recipe, until next time :)

3/19/2016

4 days* Lookbook | OUTFITS OF THE WEEK 3

Hello !
It's the end of the week and that means that it's for another outfits of the week post. This week I'll show you just 4 outfits cause I spent Tuesday at home in my pajamas, Netflix and chill all day everyday right? I was at home because our seniors were having their school leaving exams on that day, poor people, well I'm going to be in their position a year from so I should get mentally prepared. We still have plenty of time, at least let's try to pretend that but without further talking let's get to the outfits that I actually wore this week.

Monday
On Monday I went with a very spring looking outfit. I wore a peach sweater that has this super cute detail that makes it look like you have a chiffon blouse underneath it. Super neat, then I paired it with my white skinny jeans from Mango and to bring a little more color I used my tribal patterned scarf to top it off. It has some pink, grey, and peach color tones on it so I think it matched pretty nicely. As my jewelry I'm wearing my new custom initial necklace from Etsy that I'm just obsessed with ! As my coat I wore a brown leather jacket along with a same colored bag but you can't see it in to photo so sorry.


Wednesday
In the middle of the week I went with something very casual I paired a light pink shirt that has some gold studs on the collar with my lavender sweater. I think that this color combo is super pretty and flattering. As my bottom I'm wearing my dark grey jeans from Forever 21. For my Jewelry I have just two pieces One of them being my new necklace that I mentioned above and a wine red rose ring that I made myself. I combined it with a wine red bag and a wine red lipstick just to tie it all together.


Thursday
Getting to Friday I decided to go with some earthy tones, considering I was wearing all pinks and purples the rest of the week it was time for a change. I wore my new butterfly oversized T shirt from a brand called Medicine with a army green plaid shirt on top of it and then an army colored parca coat on top of it. I also decided to wear an off white scarf because it was still a little bit chilly outside. For my jeans I'm wearing the same ones as on Wednesday, my dark grey jeans from Forever 21.


Friday
This was quite a special day so my outfit was a little bit different cause we were celebrating the 25th anniversary of our French bilingual section that I attend since 2013. It was a super fun day I was doing the photographer at this event, we even had a photo booth that my friend was working on. We really enjoyed ourselves and I think that everyone left feeling really great and amused. We even had a cake to celebrate this occasion and of course as I mentioned in my Cheesecake recipe, that was prepared especially for this occasion we ate all of it. I'm very happy cause everyone loved it and seemed very satisfied with my results. But back to my outfit, to celebrate this anniversary everybody wore a t-shirt with the name of our section to proudly represent it. I paired it with my long Zara plaid shirt dress a pair of dark grey jeans from Forever 21 and my black leather coat on top. For my bag I went with something very special to my heart I wore a textile bag that I've got from my friend that I met in France.

So this was my week presented to you by my outfits. I really feel like this is more than just outfit showing because I'm sharing some stories to go along with the outfits as well which I find very fun to write so hopefully you like to read posts like this also :) That's all for today Thanks for reading