4/15/2016

Chicken Aragula Salad * RECIPE | Healthy

Hello friends !
I have another recipe for you today, spring has already come as well as the season where we just naturally go more towards those fresh salads that are peaking from every corner. At least that's the way I work, can't wait for summer and all these yummy delicious salads around me. This weekend I decided to bring these summer vibes to my household also and so I prepared this yummy Chicken arugula salad that contains some of the best ingredients.


For the salad:
4 chicken breasts (depends on how many serving you want to make)
100 g of arugula*
100 g of mache*
100 g of Feta cheese
10 cherry tomatoes
3 medium carrots
salt
pepper
*use any greens that you have on hand

For the vinaigrette:
2 and 1/2 tbsp of olive oil
1 and 1/2 tbsp of balsamic vinaigrette
1 tsp of mustard
3 cloves of garlic
salt (I used garlic seasoned salt)

So start by drizzling some salt and pepper over your chicken that you'll want to cut into bite size pieces. Then you're going to fry them in a pen over high heat until nice and tender. You can taste one bigger piece to make sure the chicken is done mine was done in 15 minutes.

While my chicken is cooking I prepare my salad, I started by washing all of my ingredients and peeling my carrot. Then I cut my tomatoes and grated the carrots into a big bowl and mixed it all together with the arugula and mache. Lastly I added the Feta cheese that I cut into bite size pieces also.

When the chicken was done I moved on to the vinaigrette I mixed all of the ingredients and poured it over my salad. I spent couple minutes mixing it all together so that the vinaigrette is evenly spread through the salad. My tip would be to not add all of the mixture at one time, that way it's going to come out a little more evenly. The last step is to add your chicken and your salad is ready.


This is a very simple recipe that can be done in many ways, what makes it really delicious is the garlic vinaigrette, it just gives it that little extra something that makes it taste like from a restaurant.

I hope that you enjoyed today's recipe, until next time Bye :)

4/12/2016

Blue checked shirt * Peachy eyes | LOOK OF THE DAY

Hello everyone !
How's your day going ? Recently we had an anniversary party in my family for my grand grand mothers 85th birthday, can you believe that ? I hope that I would be still able to party at her age :D Anyways, as usual first thing that came through my mind when she invited us was what should we gift to her, it's not everyday that you have to figure out what to buy for someone that is a lot older than you. I'm not gonna lie, it's not an easy task to figure out what someone that's 68 years older than you wants but at the end we figure it out. If you're curious we went with a nice deep plum cardigan and a scarf from H&M that has a nice floral pattern that matched the cardigan. Second thing to figure out was what the heck am I going to wear ? You know that feeling when you stand in front of your closet and you just think that you have nothing to wear, well that's exactly the feeling I had when I opened my closet on Friday. But I figured it out and this is the outcome ! :)


Fotka uverejnená používateľom Katie (@katie_pa),

Outfit

So I knew that I don 't want to go in a dress because it was quite a rainy day, unfortunately. So I decided to wear a checked dark blue shirt from Gant that I borrowed from my mum (it's great when you have the same size as your mother :D) I paired it with a pair of white jeans from Mango and to bring in some color I finished my look with a peach colored floral necklace from H&M. I also wore my dark blue wedges that I got years ago from a brand called Baťa (mostly known in Europe) and I must say that these are just the most comfortable shoes to walk in, I can literally spend whole day dancing in these shoes and my feet would still feel comfortable. Another thing that I added to my outfit was this dark blue vest from H&M that goes with this outfit really well in my opinion.

Make-up

People that know me, know, that I don't wear makeup like never ! The only thing that I'm willing to wear is a matte lipstick and occasionally some concealer when I just can't stand that little zit that pops up on the worst occasion. For special events like family gatherings I like to wear a little bit of makeup just because I enjoy it and I have a lot of time not like in the mornings when I want to use every minute to get some more sleep. So today I decided to go just with a eye look because I think that my skin looked pretty good and I wasn't needing a lot of concealer and also I don't like the feeling of tacky makeup on my skin. I matched my eye look to my necklace, I went with this soft peach color that seems to be quite popular at the moment. I don't own a lot of makeup so I improvised a little bit and to create this beautiful shade I used my Rimmel London apocalypse in atomic rose, it's a matte liquid lipstick that has the perfect peachy color. I put that into my crease and blended it upwards slightly, on the lid I placed a light metallic eye shadow from Rimmel London as well just as a pop on the lid. I also used a little bit of my gosh eyebrow pencil but that's all. Oh and I almost forgot about my mascara I'm wearing Maxfactor's masterpiece mascara in brown.

Hair

I wanted to change my hair a little bit from my almost straight hair so the day before after I washed my hair and it was almost dry I did two braids on my head that I secured on top of my head with a hair clip. I used this tutorial for heatless curls that I have found on youtube couple years ago. The next day I just combed through my newly formed curls and that was it my hair was done. The only thing that I'm sad a little bit is that my hair even after 8 hours of sleep wasn't dry all the way to the roots so the waves did not come out as usual.

That's it I hope that you liked my little look of the day/get ready with me :) Until next time

4/10/2016

Beetroot Chocolate Cake* RECIPE | Healthy

Hello everybody !
It's been a long time since I posted a recipe for a cake so I'm bringing you one today. My mom recently came across this really interesting looking recipe that reminded me of my favorite cake which is carrot cake, so I decided to give it a go. I made couple adjustments to the recipe as always because I think that it just makes a difference especially if you don't like extra sweet desserts like me. So here are the ingredients for this healthy chocolate beetroot cake:


400 g of beetroot
200 g of dark chocolate (60-70%)
100 g of carrots
100 g of whole wheat spelt flour (you can use basically whatever type of flour you like)
100 g of coconut sugar
100 g of melted butter
100 g of grounded nuts (I used walnuts)
4 eggs
2 tsp of baking powder (or 1 packet about 12 g)
1 tbsp of unsweetened cocoa powder


First you're going to start by peeling your carrots and beetroot.


Then in a food processor you're going to grate them alongside with your walnuts, you can do it manually if you don't have a food processor.


Next step is to chop the dark chocolate into small pieces you can also melt the chocolate in a microwave if you want to, that's going to make the batter combine a little better. But what you have to melt is the butter so put it in the microwave for couple seconds and pour it over your chopped chocolate mix everything well together. If you haven't melted the chocolate the butter is going to help to soften it up a little bit.

Now would be the perfect time to preheat your oven to 300 °F (150°C).
Before you put it into the oven you'll have to mix the eggs with the sugar and whisk it together. Then you're going to pour this mixture with the rest of your batter and mix well.

Last ingredients that you're going to mix in are going to be the flour and the cocoa powder.
After you have everything in, go ahead and mix everything well, you're going to get a very thick dough, but don't worry that's exactly what you want.


Now it's time to pour the batter into your mould and put it in the oven for 30-45 minutes depending on your oven. Best trick for determining if your cake is baked through is to take a toothpick and poke it in your cake, if it comes out clear everything should be nice and done on the outside as on the inside.

That's it your healthy beetroot cake is done and ready to be served, you can put some melted chocolate on top if you think that it isn't chocolate-y enough or a little bit of jam if you like a little bit of a sour twist to it.


I hope that you liked today's recipe, this was the first time I made this recipe and I must say that I'm pleasantly surprised by the way it came out.

4/08/2016

5 days* Lookbook | OUTFITS OF THE WEEK 5

Happy Saturday everybody !
Can you believe it that this is already my fifth installment of my outfits of the week series ? I'm still really enjoying making these look books as my journal I think that it is nice just to reflect at the end of the week at what you wore and why you decided to wear it :) I hope that you're enjoying this series also and without further talking let's get to this weeks outfits.

Monday
I'm so glad that spring has finally arrived cause man I hate those winter cold temperatures ! I'm finally able to leave my house without my winter jacket which is a super nice change. This fact also encouraged me to finally wear my new tank top that I got from H&M almost half a year ago. It's in this beautiful burgundy/marsala color and the pattern kind of looks like moon phases to me, I really like the cut of it it. I think that peplum just looks super cute and lovely very girly definitely. I paired it with my yellow jacket from Forever 21 and my skinny black jeans from Forever 21. Also for my jewelry I went with my Dorothy Perkins necklace and as usual my staple, my watches from Primark. I paired it with a quilted black bag and a pair of burgundy flats that look a little bit like oxford's.


Tuesday
On Tuesday I really wanted to incorporate my new royal blue flats in my outfit. I got them on sale at Tesco for 6$ that's a steal, right ?! I was thinking about many combinations before I came up with this one. So I paired them with a pair of white jeans from Mango and a long sleeved striped blue shirt that matches my flats. I finished my look with a nude colored poncho from Tesco that has some aztec prints on it and my brown bag that matches the stripes on my shirt.


Wednesday
This outfit is actually very similar to my rose quartz outfit that I wore couple weeks ago you can check it out in this look-book. I went with the same color scheme, because I just love this year colors of the year I think that it's such a great combination very girly :) So enough said I paired a grey turtle neck shirt with my v neck sweater from Tommy Hilfiger. I completed the look with a pair of blue jeans from H&M and my floral flats from H&M that I got last year.


Thursday
We're getting almost to the end of the week sadly the temperature were going slowly down on this day so I had to take out some warmer clothes but still I enjoyed my outfit a lot. The main piece of my outfit were my new Keds shoes that have this super cool galaxy neon pattern. I paired them with my simple black jeans from Forever 21 and on top I had my dotted sweater and a grey turtle neck shirt from F&F underneath it. I finished the look with my quilted black bag and a pink lipstick that matches my shoes.


Friday
Finally after a long week Friday has come! It was really cloudy on Friday but still i decided to wear a skirt, more precisely my floral black skirt from stradivarius that i paired with peach colored sweater and a black long sleeved t shirt because as i said it was quite chilly on Friday. I completed my outfit with an infinity scarf and a cross body bag that has some army green accents.


Thanks a lot for reading, until next time :) If you missed my last look book you can find it here.


4/04/2016

Tarte au thon * RECIPE |

Hello guys,
so my last Tarte recipe was a real success so I came up with a follow up recipe this time using some tuna. This recipe comes from my Host Mum in France that was so nice to write me down her recipe for this delicious meal. If you haven't checked my previous Tarte recipe you can check it out here, where I also demonstrate step by step how to make the dough or in French La pâte brisée. Let's get right into it.
For the dough
200 g of spelt flour
150 g of butter
1 tsp of salt

For the filling
330 g of crème fraîche (sour cream)
240 g of canned tuna
2 eggs
3 tomatoes
3 tbsp of corn
a little bit of mustard
pepper to taste

So I'm not going to go in detail how I made my dough, but it's very simple and I explain it in depth in this recipe. This time around I made a couple changes I used spelt flour because I haven't had any whole wheat on had, and I also used a little bit more salt because I find that the dough has a better taste after that.

When you're done with your dough you can start mixing up all the ingredients for the filling start by pouring the sour cream into a bowl add your canned tuna make sure to pour all of the olive oil out if you have bought a tuna that comes in olive oil as mine did. Beat 2 eggs into your mixture as well. Add the corn and then add some pepper to your taste. Now you're just going to combine all the ingredients, mix it well so there are no lumps of tuna or any big yolk part of the eggs.

Now you can butter up your mould add the dough in make sure that the dough is nicely pressed into the mold and that the sides of the mould are all covered as well. Then preheat your oven to 180°C. When you have your dough inside of your mould you can spread a little bit of mustard on the bottom, this will give a lot of flavor to the tart.

And now you're basically done and can pour the mixture into the mould.

Cut some tomatoes and top it off with some grated parmesan.

That's it if you're satisfied with how your Tarte looks you can go ahead and put it into the oven for 45 minutes. Make sure to check it once in a while so it doesn't get burned or something similar.


You're done ! You can now enjoy this beautiful french piece of art that is so simple to make but really delicious to taste ! :) Thanks for reading through this recipe until next time :)

4/03/2016

Easy Coconut Chocolate Cake* RECIPE | Grain free, Refined sugar free

Hello everybody
I have something new for you today, my first chocolate cake. I wanted to please my father because he just won bronze medal with his junior ice hockey team YAY ! So I made him this delicious simple chocolate cake because he just always complains there is not enough chocolate in my cakes, well I usually do fruity desserts and I don't like mixing fruits and chocolate too often so that's probably true. But this time to celebrate this victory I decided to do something completely different, I was searching for a quick simple cake that would involve a lot of chocolate and so I found this one that I slightly modified to meat my needs and here is what I come up with.

For the crust:
200 g of shredded coconut
4 tbsp of butter (unsalted)
1 tbsp of honey

For the filling
3 bars of 60% or 70% dark chocolate (you can use semisweet of dark chocolate is not your thing)
360 ml of heavy whipping cream (33%)

Start by preheating your oven to 350°F (180°C).

So to start of with the crust your going to measure about 150 g of your shredded coconut into a bowl then you'll continue by mixing in 1 tbsp of honey and 4 tbsp of butter. The butter doesn't have to be dissolved it should be room temperature for best results.

Try to combine the coconut with the butter it's going to be more or less crumbly depending on how finely is your coconut shredded. Mine was kind of thick so it was really crumbly I was worried for a while but at the end I think it worked out nicely.

Then I started pressing my mixture in to the mould, I use a silicone one but I would recommend using something different just because the silicone is super slippery and it's really hard to create an even layer without pulling some of the coconut off.


Then when you think you have a nice foundation add the rest of the coconut about 50 g if you measured correctly and just press it onto your newly formed crust. Now it should look more solid, you want a 0,5 cm thick layer. If you'd like to have the coconut crust on the sides I would recommend using more coconut I opted to skip this step just because I found that it was difficult to do in my silicone mould but I can see this working in a tin mould for example.


So next step is to bake your crust for 5-10 minutes depending of your oven. Mine crust got golden pretty quick I was even worried that it got burnt but my mum assured me that it's fine next time I'm going to control it a little bit more. If you opted that you want that coconut crust one the sides I would recommend using a tin foil ring to cover up the edges so they don't end up burned as described in the original recipe that you can find here.

When my crust was done I let it cool on my counter and continued by making the chocolate ganache filling. First I've put my heavy whipping cream into a pot/pan and brought it to a boil over medium heat. It took less than 5 minutes and you know that your cream is boiling when you see little bubbles on the side of your pot.


 When you finally see that your cream is ready turn the heat off and put your dark chocolate in, you want to chop the chocolate before hand so that it melts quicker.


Then leave the chocolate in for 10 minutes alone without mixing it just as it is it's going to look like "chocolate milk" with little bits of chocolate in it but don't worry it will transform into this beautiful smooth chocholate filling just as you started mixing it in.

So after 10 minutes have passed your chocolate should be mostly melted and ready to be incorporated with the cream, I just took a spatula and mixed it together until a rich smooth chocolate mixture formed in front of my eyes.


Then I carefully poured it onto my coconut crust and let it sit in the fridge for couple hours ideally overnight.

Of course we couldn't wait so here is the finished product. I hope that you liked another dessert recipe, I have been trying to make something different this time so I hope you appreciate that :) Until next time Bye


4/01/2016

4 days* Lookbook | OUTFITS OF THE WEEK 4

Hello guys !
I know I missed a week but I actually decided to combine two weeks in one cause once again we had a school break this time it was due to Easter. I've been at home for about a week and  you just can imagine how lazy I am to put anything else then my leggings on so I was really slacking off with my outfits but I managed to comply 4 that I wore during these 2 weeks that I would like to share with you so here it is :)

Monday

So starting off my week with a simple outfit including one of my favorite color combos which is purple and brown. I was actually wearing this outfit to the cinema, we went out with my mum to see Allegiant and I must say I wasn't as disappointed as I was after seeing Insurgent but still I don't think it's better than the books. But back to my outfit I wore this huge scarf as my main piece, It's from the brand Esprit and it's super comfy and it keeps you warm that's basically why I decided to wear it. I paired it with a plain high neck lavender sweater and a pair of black fitted jeans from Forever 21. Because we're still in the lower temperatures I also put on my brown leather jacket from the brand Toxiqu3 that I got at TJ Maxx while it was on sale. My bag is a super simple quilted black bag that I've got at a local store that's called House.

Tuesday

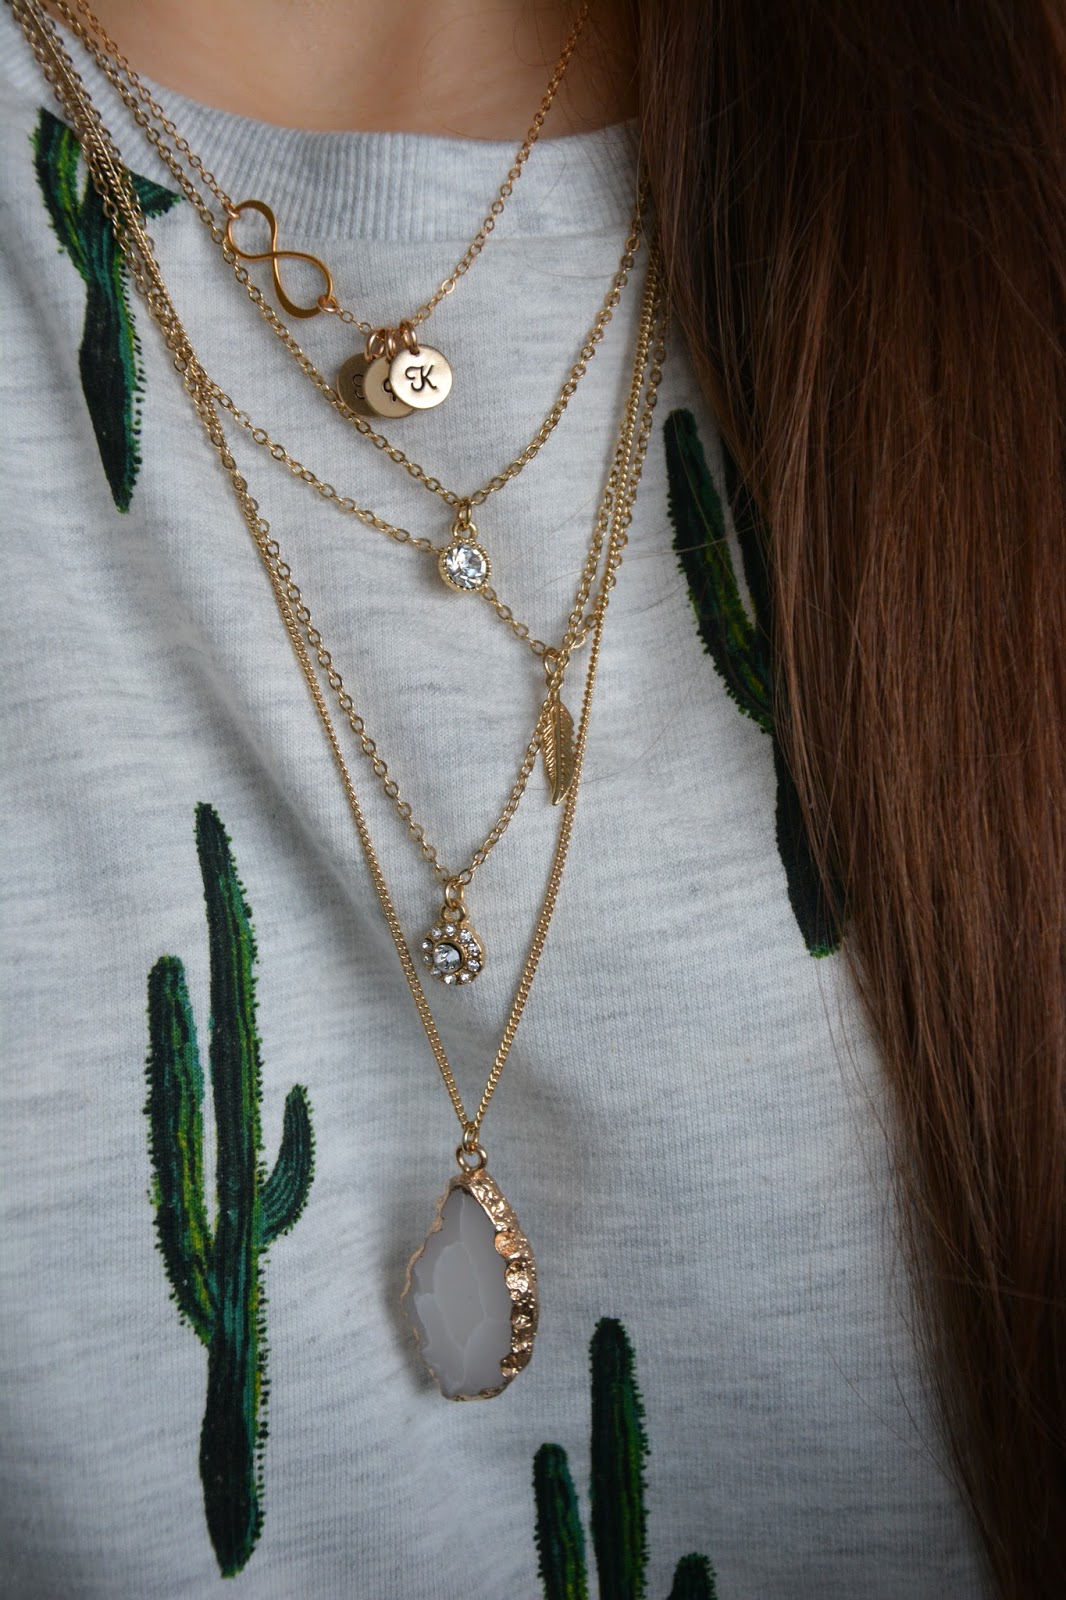
This is probably my favorite outfit out of the bunch. I'm wearing a sweater that I got while I was at cinema last night. It's this cute sweater/top from H&M with these little cactuses, from the moment I saw it I just couldn't stop looking at it so I had to have it and I love it. I've got a lot of compliments on this one also. To make it stand out I paired with a set of necklace from Dorothy Perkins and my custom Etsy necklace with my Family's initials. Then I paired it with a pair of black jeans from Forever 21 and my "Hipster" shopper bag that my friends from France gave me.


Wednesday

Last day of school before our Easter break, it was also teacher's day so we were in school for just 4 hours which was amazing but back to what I was wearing. I went a little but nautical with my striped shirt that I combined with a patterned scarf from Next and a cool oversized coat from Esprit that is kinda color blocked. I paired it with my white jeans, I also added my new navy blue belt and to tie all of my accesories I wore a pair of golden watch from Primark.


Friday

So first day of school after a week of basically doing nothing and catching up on all of my missed walking dead episodes. I also watched a whole season of Property Brother these guys are just amazing, again I'm just talking to the wind :D For this sad day of going back to school I wanted to wear something comfy So I went with something casual. I wore my Adidas Originals floral tank top I just love this pattern I have actually a hoodie with this same pattern also. I paired it with a simple grey cardigan and a pair of white jeans from Mango. As usual for my accesories I'm wearing my golden watches and my new nude belt. I also wore my white converse shoes that I got for christmas this year.


That's it, I hope that you liked another weekly update on what I was wearing until next time Don't forget to check out my other look books WEEK 1 WEEK 2 WEEK 3 and my H&M one as well :) Bye